Melt-in-Your-Mouth Cheez-It Peanut Butter Bites
Craving a unique snack? Try my Melt-in-Your-Mouth Cheez-It Peanut Butter Bites! They're indulgently creamy and savory, perfect for any occasion.

- The Sweet & Salty Magic of Melt-in-Your-Mouth Cheez-It Peanut Butter Bites
- Snack Time Reimagined: A Recipe Overview
- Why They’re So Good: Key Benefits
- Transition to Ingredients
- Essential Ingredients Guide for Melt-in-Your-Mouth Cheez-It Peanut Butter Bites
- Professional Cooking Method: The Sweet Science Behind Melt-in-Your-Mouth Cheez-It Peanut Butter Bites
- Pro Tips & Secrets
- Perfect Presentation
- Storage & Make-Ahead
- Creative Variations
- Complete Nutrition Guide
- Wrap-Up
- Frequently Asked Questions
- Recipe Card
The Sweet & Salty Magic of Melt-in-Your-Mouth Cheez-It Peanut Butter Bites
Oh my gosh, let me take you back to my childhood! picture this: i’m at my grandmother’s house, rhelping the pantry for snacks.
Every time, my hand would dive into that bright orange box of cheez-its. they were the epitome of perfection—crunchy, cheesy, and just downright addictive.
Fast forward a few years, and what do i discover? a recipe that combines that beloved crunch with creamy peanut butter.
Melt-in-your-mouth cheez-it peanut butter bites were born! talk about a happy snack accident.
Snack Time Reimagined: A Recipe Overview
Now, you might be wondering where this delightful fusion came from. the idea of using cheez-its in desserts is as quirky as it sounds, but honestly, it’s all about blending sweet and salty.
It really takes snacking to a whole new level. these bites are super popular today, especially among families looking for fun and unique easy snack ideas .
You don’t even need an oven—a major win for anyone who’s ever burned a batch of cookies!
These bites take about 15 minutes of prep and only 30 minutes in the fridge. so, in less than an hour, you can whip up around 24 bites that are perfect for parties, or just binge-watching your favorite show.
And let’s not forget about costs—most of the ingredients are simple staples you probably already have lying around. win-win!
Why They’re So Good: Key Benefits
You bet there are bonuses to these melt-in-your-mouth cheez-it peanut butter bites ! first off, they pack some solid health benefits .
The peanut butter offers a good dose of protein, making these crunchy chocolate bites more than just a guilty pleasure.
They’re not overly sugary either, so you'll have that sweet-salty balance that makes them a kid-friendly recipe and a clever choice for adults too.
Plus, they’re versatile. you can serve these bites at parties as a fantastic party snack idea , or indulge in them whenever you’re craving something sweet.
And if you're looking for guilt-free treats , this recipe comes in clutch! you can even make these bites ahead and freeze them.
Snack prep for the week? yes, please!
Transition to Ingredients
Now, if you’re itching to know how to create these sweet and salty snacks from scratch, let’s dive into the ingredients.
Trust me, as someone who has had my fair share of kitchen mishaps, i can assure you that this recipe is straightforward, accessible, and every ounce of delicious.
Grab your measuring cups and get ready for a chocolate-coated adventure with cheez-its!
Let’s get started, and you’ll soon have crispy, creamy bites that are perfect for any occasion!
Essential Ingredients Guide for Melt-in-Your-Mouth Cheez-It Peanut Butter Bites
So, you’re ready to whip up some Melt-in-Your-Mouth Cheez-It Peanut Butter Bites ? Let’s talk about a few key ingredients. Knowing what you’re working with can make all the difference, trust me.
Premium Core Components
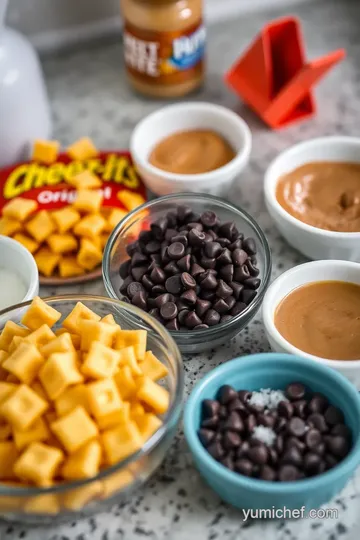
First things first, let’s chat about the must-have ingredients. for this recipe, you'll need 1 cup (250 g) of creamy peanut butter , 1 cup (100 g) of powdered sugar , and 1 ½ cups (150 g) crushed cheez-its .
Oh man, just the thought of it!
- Quality indicators ? Look for smooth peanut butter, no additives. When selecting Cheez-Its, go for the ones that are fresh and crunchy —that texture is key in these bites.
- Storage guidelines : Keep your peanut butter in a cool, dry place, and the Cheez-Its too. They'll stay fresh in an airtight container for a fortnight—if they last that long!
- Freshness tips : Always check the expiration dates, especially on your powdered sugar. And a quick taste test is never a bad idea—you know, just to be sure!
Signature Seasoning Blend
While we’re not diving deep into a whole spice rack, creating that perfect balance of flavors is super important. you’ll want to have ½ teaspoon of vanilla extract for that nice touch of sweetness.
This simple addition elevates the bites from “meh” to “wow”—trust me on this one. if you wanna get fancy, consider adding a sprinkle of sea salt on top once the chocolate coating sets.
It’s a game-changer for that sweet and salty hit we all crave!
Smart Substitutions
Now, let’s say you’re missing some ingredients or need to make a quick swap.
- Common alternatives : If you don’t have peanut butter, try almond or even sunflower butter. It’s all about what you have on hand!
- Dietary modifications : For a gluten-free twist, just grab gluten-free Cheez-Its! Easy peasy.
- Emergency replacements : Running low on powdered sugar? Just blitz granulated sugar in a blender until fine. Boom, instant powdered sugar!
- Seasonal options : Swap in mini chocolate chips or chopped nuts for added texture in the bites.
Kitchen Equipment Essentials
Okay, it’s time to gather some tools. Don’t sweat it; you probably have these already!
- Must-have tools : A mixing bowl, rubber spatula, and measuring cups are essential for this recipe. You’ll also need a baking sheet lined with parchment paper.
- Alternative equipment options : If you don’t have a microwave, no worries! Just use a double boiler to melt the chocolate. A little old-school never hurt anyone.
- Preparation tips : Stick the bites in the fridge to firm up nicely. It makes dipping into chocolate much easier! Seriously, chilling is key, like California on a sunny summer day.
- Storage solutions : Grab an airtight container to keep these bites fresh. They’ll be good for about a week in the fridge—if they last that long!
As you're gathering your ingredients and equipment, just remember this isn’t just about making treats. it's about creating memories —like those fun family recipes you used to whip up on lazy afternoons.
Whether you’re serving them as party snack ideas or just pampering yourself with some guilt-free treats , these bites will definitely deliver!
Alright, now that you have the essentials down, get ready for some fun instructions on whipping up your melt-in-your-mouth cheez-it peanut butter bites .
You’re gonna love every crispy, creamy, chocolatey bite! let’s dive in!
Professional Cooking Method: The Sweet Science Behind Melt-in-Your-Mouth Cheez-It Peanut Butter Bites
You ever wish you could just melt away stress while whipping up a treat that tickles both sweet and savory taste buds? if you said yes, then get ready because we’re diving into the wild and delicious world of melt-in-your-mouth cheez-it peanut butter bites .
This isn’t just any snack, folks; it’s an experience! plus, it falls under no-bake desserts , making it a total win for busy folks and kids alike.
Let’s break this down with some expert cooking methods to ensure your bites turn out pillowy and perfect.
Essential Preparation Steps
Before you dive in, one word: mise en place ! this fancy french term just means “everything in its place.
” get your ingredients together and ready to go. for our delightful bites, gather 1 cup of creamy peanut butter, 1 cup of powdered sugar, and 1½ cups of crushed cheez-its.
While you're at it, cue that time management beast! you're looking at a total of 45 minutes for prep and chilling— 15 minutes active time .
Sure, that's all just mixing around, but let’s not get ahead of ourselves.
Keep organization in mind! lay everything out in your kitchen, and have your measuring cups and spoons prepped. you’d be surprised at how a little structure can save a lot of hassle.
And don’t forget about safety —check those chocolate melting temperatures! if you're using the microwave, go with 30-second intervals ; nobody wants burnt chocolate.
Step-by-Step Process
-
Prepare the Baking Sheet: Cover a baking sheet with parchment paper. Honestly, this step saves you from disaster—trust me.
-
Mix It Up: Combine that dreamy, creamy peanut butter, powdered sugar, crushed Cheez-Its, and a splash of vanilla extract in a mixing bowl. Stir until you get a smooth dough.
-
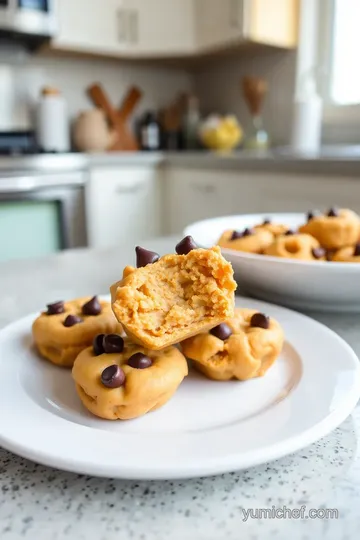
Form Those Bites: Grab about a tablespoon of the mix and roll it into a ball. Place each on the baking sheet and repeat until you're out of mix. Easy peasy!
-
Chill Time: Pop those bites in the fridge for at least 30 minutes . Chilling is crucial, helping those bad boys firm up before chocolate coating.
-
Get melty: time to melt! in a microwave-safe bowl, combine 1 cup of semi-sweet chocolate chips and, if you want smoother chocolate, add 1 teaspoon of coconut oil.
Then, zap it in the microwave— 30-second intervals —stirring between until it's smooth.
-
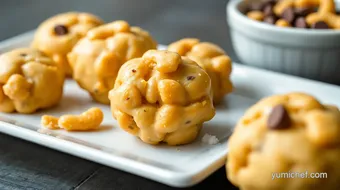
Coat and Chill Again: Dip those chilled bites in your melted chocolate, letting the excess drip off. Back to the baking sheet they go. Let them cool and harden.
-
Serve Up: Once set, dive right in, or stash them in an airtight container. Whichever you choose, they're gonna be popular.
Expert Techniques
Now, let's tackle some expert techniques . always taste your combinations. if the dough feels too dry, toss in a splash more peanut butter.
You want it to be just right. and remember, that chocolate? get creative! drizzle it on top for nice visuals and extra flavor.
As for troubleshooting , if your bites didn’t hold together well, you might’ve left them out too long before refrigerating.
Don't sweat it! just remix those flavors with a little more peanut butter.
Success Strategies
A couple of success strategies to keep in your back pocket:
- Avoid overwhelming flavors! Sometimes less is more, so don’t go wild with add-ins unless you’re feeling it.
- Assure quality by tasting as you go! You want delicious, creamy peanut butter bites, not a haphazard mess.
And if you’re making these for a gathering, consider prepping a day ahead for an easy party snack idea . Just let them chill overnight!
So there you have it! with a little care and love, your melt-in-your-mouth cheez-it peanut butter bites will be an absolute hit.
You’ll love how seamlessly these chewy bites fit into your routine, especially as quick snacks for kids or fun family recipes to share.
Stay tuned for more additional information , because this recipe is going to leave you craving even more sweet peanut butter treats!
Pro Tips & Secrets
Diving into the world of melt-in-your-mouth cheez-it peanut butter bites ? oh boy, you’re in for a treat! let me hit you with some chef’s personal insights that’ll make the whole process a breeze.
First off, time-saving techniques are key: smashing those cheez-its can be a pain. instead of crushing them by hand, toss 'em into a food processor.
It’s quick and you’ll save your arm from getting tired!
Now, to really enhance that flavor , don’t skip the vanilla. a little splash goes a long way and amps up the sweet and salty combo.
And here’s a tip: if you can let those bites chill a bit longer than the 30-minute mark, do it! they’ll get even firmer and easier to coat in chocolate.
Oh, and don’t forget about presentation! Place those beauties on a colorful platter, or even stack 'em high for a show-stopping effect. Remember, we eat with our eyes first, right?
Perfect Presentation
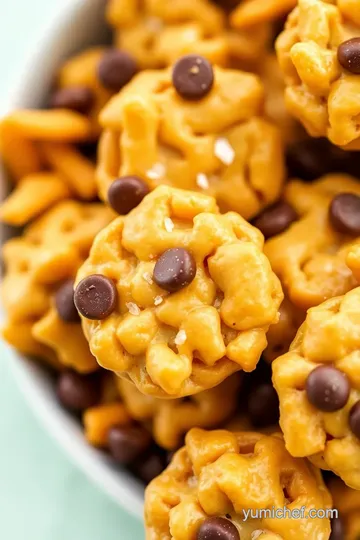
Okay, let's talk plating techniques . when it comes to these bites, simplicity is key. a sprinkle of crushed cheez-its on top of the chocolate-coated bites adds a nice texture and looks super fancy.
Now, for some garnish ideas , fresh fruit works wonders. a few fresh strawberries or sliced apples on the side brings color and balance to your snack.
And speaking of colors, mix up your color combinations! a light drizzle of white chocolate on top of the chocolate-covered bites gives that classy finish.
Want some visual appeal tips ? Try serving them in cute little cupcake liners. These bites will look all dressed up for your next party!
Storage & Make-Ahead
What’s the deal with storage? you might think these snacks won’t last long, but you can keep them in an airtight container in the fridge for up to a week.
If you’re doubling the recipe (and you probably should—it’s that good!), these bites can also be frozen. just make sure to separate them with parchment paper so they don’t stick together.
For preservation methods , if you’re wrapping them up for a gift, wrap each bite in a piece of plastic wrap.
Trust me; this makes them look fancy! when it’s time to indulge, just reheat them for a few seconds in the microwave if you like a warm treat.
They hold their freshness beautifully for at least a week!
Creative Variations
Feeling adventurous? here are some flavor adaptations . swap out peanut butter for almond butter or sunflower seed butter for a nut-free version—it’s still delicious! if you’re into a bit of crunch, toss in some mini chocolate chips or chopped pretzels into the mix for fun textures.
Get seasonal! in fall, add a sprinkle of pumpkin spice for a festive twist. and how about regional variations? in the south, add some crushed pecans for a bit of southern charm.
The possibilities are endless!
Complete Nutrition Guide
Before you dig in, let’s chat about the nutrition . each of these melt-in-your-mouth cheez-it peanut butter bites clocks in around 120 calories, which is totally manageable for a snack.
They pack in 3 grams of protein too! if you use natural peanut butter, you also get some healthy fats.
Just make sure to keep track if you're portioning them out— it’s easy to go back for one (or three) more!
For those who care about dietary considerations, look for gluten-free Cheez-Its if you want to stick to those gluten-free vibes. You can easily whip up some guilt-free treats without sacrificing flavor!
Wrap-Up
So there you have it, folks! these melt-in-your-mouth cheez-it peanut butter bites are not only easy to whip up but bursting with flavor and fun! use these easy snack ideas and no-bake desserts to impress your friends and family.
You’ll nail that savory sweet treat next time you’re entertaining.
Get the family involved—i promise this will be a moment of joy in your kitchen. just remember: life’s too short for boring snacks! go ahead, dive right into these delicious bites.
You totally got this!
Frequently Asked Questions
What are Melt-in-Your-Mouth Cheez-It Peanut Butter Bites?
Melt-in-Your-Mouth Cheez-It Peanut Butter Bites are a delightful, no-bake treat that combines the savory crunch of Cheez-Its with creamy peanut butter and a smooth chocolate coating. These bites are easy to make and offer a unique flavor and texture experience that's perfect for satisfying cravings or serving at gatherings.
Can I make Melt-in-Your-Mouth Cheez-It Peanut Butter Bites gluten-free?
Yes, you can make these bites gluten-free by using gluten-free Cheez-Its. Just ensure that all other ingredients, including chocolate and any add-ins, are also certified gluten-free for a completely safe treat.
How do I store Melt-in-Your-Mouth Cheez-It Peanut Butter Bites?
Store the bites in an airtight container in the refrigerator for up to one week. If you want to keep them longer, you can freeze them for up to three months. Just be sure to separate layers with parchment paper to prevent sticking.
Can I customize the flavors of the Melt-in-Your-Mouth Cheez-It Peanut Butter Bites?
Absolutely! You can substitute peanut butter for almond or cashew butter for a different flavor profile. Adding mini chocolate chips or nuts to the mixture can also introduce extra crunch, and drizzling with white chocolate adds a beautiful finish.
What are some tips for achieving the best texture when making Melt-in-Your-Mouth Cheez-It Peanut Butter Bites?
To achieve the best texture, ensure the mixture is well-combined and holds together when rolled into balls. If the mixture is too dry, adding a bit more peanut butter can help. Also, chilling the bites thoroughly before coating them in chocolate will ensure they maintain their shape during the dipping process.
What is the nutritional information for Melt-in-Your-Mouth Cheez-It Peanut Butter Bites?
Each bite is approximately 120 calories, containing 3g of protein, 7g of fat, and 12g of carbohydrates. Note that these values can vary based on the specific brands and ingredients you use, so it's best to adjust according to your preferences and portion sizes.
Melt-in-Your-Mouth Cheez-It Peanut Butter Bites Card
⚖️ Ingredients:
- 1 cup creamy peanut butter
- 1 cup powdered sugar
- 1 ½ cups crushed Cheez-Its
- ½ teaspoon vanilla extract
- 1 cup semi-sweet chocolate chips
- 1 teaspoon coconut oil or vegetable oil (optional)
🥄 Instructions:
- Step 1: Line a baking sheet with parchment paper.
- Step 2: In a mixing bowl, combine peanut butter, powdered sugar, crushed Cheez-Its, and vanilla extract. Mix until a smooth, cohesive dough forms.
- Step 3: Using your hands, scoop out about 1 tablespoon of the mixture and roll into a ball. Place on the prepared baking sheet. Repeat until all mixture is used.
- Step 4: Refrigerate bites for at least 30 minutes until firm.
- Step 5: In a microwave-safe bowl, combine chocolate chips and coconut oil. Microwave in 30-second intervals, stirring in between, until melted and smooth.
- Step 6: Dip each chilled bite into the melted chocolate, allowing excess chocolate to drip off. Return to the baking sheet and let cool and harden.
- Step 7: Once the chocolate is set, serve immediately, or store in an airtight container in the refrigerator.
Previous Recipe: How to Bake Vegan Jalapeño Cheese Bread Quickly: A Comforting Delight
Next Recipe: My Easy & Refreshing Quick Cucumber Salad with Fresh Flavors