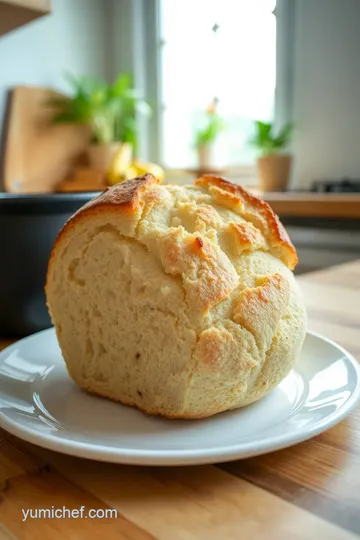
Crusty Artisan Sourdough Bread: A Healthy & Delicious Delight
Looking to bake sourdough bread at home? Try my treasured sourdough recipe that delivers a healthy, tasty loaf with a crispy crust—perfect for all occasions!

- A Slice of My Life: The Joy of Baking Sourdough Bread
- Essential Ingredients Guide
- Mastering the Art of Professional Cooking: Your Sourdough Journey
- Pro Tips & Secrets for Baking Sourdough Bread
- Perfect Presentation: Make Your Loaf Shine
- Storage & Make-Ahead: Keep It Fresh
- Creative Variations: Mix It Up
- Expert FAQ Solutions
- Conclusion: Your Delicious Journey
- Recipe Card
A Slice of My Life: The Joy of Baking Sourdough Bread
Oh my gosh, i’ll never forget the first time i baked sourdough bread . i was standing in my tiny kitchen, flour everywhere, and a wild yeast starter bubbling away like a science experiment gone right.
Honestly, i felt like a wizard conjuring up magic from flour and water. have you ever watched a loaf rise and then smelled that crusty goodness as it bakes? pure bliss! today, let's talk about why you should bake sourdough bread - healthy & tasty and how it can fit perfectly into your life, whether you’re a seasoned baker or just starting out.
The Evolution of Sourdough: From Ancient to Artisan
When you dive into the world of homemade sourdough , you're embracing a history that stretches back thousands of years.
This traditional sourdough recipe has its roots in ancient civilizations, relying on wild yeast and the fermentation process for bread to create that irresistible tang and texture we love.
Nowadays, it’s not just a trend; sourdough has become a staple in many kitchens across the country. with its rise in popularity, baking sourdough at home has even turned into a delightful way for families to bond.
So, how much time are we talking about here? well, prepping the dough takes about 30 minutes, but don’t forget the 8- 12 hours for the sourdough starter to ferment and work its magic.
This is followed by around 45- 50 minutes in the oven. just remember, patience is key. but trust me when i say, the effort is totally worth it! also, making your own sourdough can save you bucks compared to buying artisanal bread from fancy bakeries.
Plus, you get a big, honkin’ loaf that will last a bit longer than those small, store-bought ones.
Why Sourdough Rocks: Benefits Beyond Taste
Now, let’s talk about the good stuff. not only is sourdough scrumptious, but it also brings a bunch of health benefits .
We're talking about better gluten development in bread , which can make it easier to digest for some folks. plus, the nutritional benefits of sourdough are nothing to sneeze at; it’s often richer in vitamins and minerals than your average loaf.
Some say that real sourdough can even help with gut health, making it one of those healthy bread options we all crave.
Sourdough is also a rock star when it comes to versatility. you can make whole grain sourdough , add herbs or seeds for extra flavor, or follow unique twists on the crusty bread recipe .
It’s perfect for special occasions or even just a cozy night in. seriously, nothing beats a fresh loaf paired with cocktails or a hearty spread; it’s party food at its best!
Time to Gather Your Ingredients
Are you ready? let's get down to the nitty-gritty. before you jump in, it’s smart to gather all your bread baking tools .
You know, things like mixing bowls, a kitchen scale (because precision matters), and a trusty dutch oven. and don’t forget about that bubbly sourdough starter! if you’re new to this whole sourdough adventure, check out some beginners sourdough baking tips.
They'll really help you nail that perfect sourdough crust .
By the time you’re mixing those flours with that tangy starter, you’ll feel like a pro. just imagine all the fun variations you can create—herbed, seeded, whole wheat—you name it! the possibilities are endless, and you’ll soon find out the joy of scoring sourdough bread before popping it in the oven.
Ready to dive into ingredient lists and get your hands doughy? Let’s keep this momentum going, folks! Get your apron on, and let's create some sourdough magic together.
Essential Ingredients Guide
Baking sourdough bread isn’t just a culinary adventure; it’s like stepping into a timer machine linking you to traditions that really matter.
As you embark on this journey, let’s break down everything you’ll need to make that crusty artisan sourdough bread that’s not only healthy & tasty but also full of character.
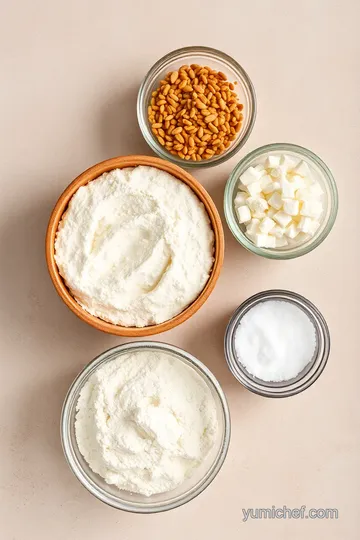
Premium Core Components
First off, let’s get down to the Premium Core Components you can't skimp on.
For your sourdough starter , you'll need precise measurements. typically, you want 120g (1/2 cup) of all-purpose flour and 120g (1/2 cup) of room-temperature water.
Quality matters, so look for organic bread flour. trust me, it changes the game!
Storage Guidelines? Keep your sourdough starter in the fridge if you're not using it daily. With proper care, it can last indefinitely. But make a point to keep it fed every week!
Now, about choosing ingredients: Freshness tips are key. Look for flour that’s unbleached and has no added preservatives. Check the labels, because fresh flour means better flavor.
Signature Seasoning Blend
Now, on to the Signature Seasoning Blend that brings your bread to life!
While sourdough itself sings with natural flavors, you can elevate it with essential spices and herbs. i love adding a sprinkle of sea salt ( 10g or 1 3/4 teaspoons )—it really enhances the whole sourdough flavor profile .
When talking herbs, consider thyme or rosemary—trust me, it brings out those artisan vibes! and if you’re feeling adventurous, throw in some garlic powder for a twist.
Think of this as your bread’s wardrobe; it deserves that extra bling!
Smart Substitutions
What’s that? You ran out of something? Don’t sweat it!
Here are some smart substitutions for when you’re in a bind. if you can’t find bread flour , plain ol’ all-purpose flour works in a pinch.
Sure, you might lose that chewy texture, but it'll still be delicious !
For dietary modifications, you can replace regular water with buttermilk. This adds a wonderful richness and takes things to the next level. It’s like upgrading from a sedan to a sports car!
Kitchen Equipment Essentials
Let’s not forget the Kitchen Equipment Essentials . You need the right tools for success.
A quality kitchen scale is a must—don’t even think about eyeballing flour. It’s all about accuracy, baby!
If you’re looking for alternatives, a simple mixing bowl and a sturdy bench scraper can work wonders. and what about the baking vessel? dutch ovens are great because they trap steam, giving you that perfect crust.
And who doesn’t love a perfect crust?
Ready to Bake?
Now that you’ve got the essentials locked and loaded, are you ready to bake that sourdough bread? You know, the one that not only tastes amazing but also offers great health benefits ? Whether you’re diving into a traditional sourdough recipe or trying out whole grain sourdough , the process is as much about the journey as it is about your delicious result!
Baking your own sourdough at home offers a sense of accomplishment that store-bought just can’t match. plus, you gain insight into the fermentation process for bread , which not only gives it that classic sour flavor but also makes it easier on your tummy.
So grab that sourdough starter guide , fire up your oven, and let’s get to the fun part: how to bake sourdough! Your kitchen is about to smell incredible !
Mastering the Art of Professional Cooking: Your Sourdough Journey
Diving into the world of professional cooking sounds intimidating, but trust me, it doesn’t have to be! especially when it comes to something as satisfying as baking sourdough bread.
Let’s break this down into easy steps, so you can enjoy the process as you whip up a lovely loaf of artisanal bread right from your kitchen.
Get ready to impress family and friends with your homemade sourdough!
Essential Preparation Steps
First things first—preparation. you’ll hear fancy chefs toss around the french term mise en place , which just means having everything in its place.
For sourdough, this means gathering your ingredients and tools ahead of time. you only need five ingredients : flour, water, salt, and a good sourdough starter.
Trust me, having everything ready makes all the difference!
Next up, time management . make sure you allow 8- 12 hours for your starter to do its thing overnight.
This fermentation process is crucial for flavor. and don’t stress—start when you have some spare time. give yourself a 30-minute window for mixing the dough, and you’ll be on your way.
Now, let’s talk organization. label your bowls if you’re juggling several batches. you don’t want to confuse your dough with dinner prep! and safety? always.
Keep your workspace clean and be cautious with sharp tools like your lame (that's a fancy knife for scoring).
Step-by-Step Process
Here’s where the magic happens. Follow these clear, numbered instructions to nail your sourdough:
-
Prepare the Starter : Mix 120g flour with 120g water . Cover and leave it for 8- 12 hours at room temperature.
-
Make the Dough : Combine 500g bread flour with 375g water . Let it rest for 30 minutes —this is your autolyse . Then, add 150g starter and 10g salt .
-
Bulk Fermentation : Cover your bowl with a damp cloth and let it rise for 4- 5 hours , doing stretch and folds every 30 minutes .
-
Shape Your Loaf : After the bulk rise, shape your dough and let it rest for another 30 minutes .
-
Final Rise : Shape it again, place it seam-side up in a coated basket, and let it rise for 1- 2 hours .
-
Preheat Oven : About 30 minutes before baking, get that oven to 450° F ( 232° C) and put in your Dutch oven.
-
Score and bake : when you’re ready, carefully transfer the dough and score it. cover and bake for 30 minutes , then uncover to bake for another 15- 20 minutes until it’s golden brown.
-
Cool : Don’t cut into that fresh loaf just yet! Let it cool for at least 1 hour on a rack.
Expert Techniques and Common Mistakes
You know how it goes—part of the fun in baking is learning from goofs. A common mistake? Not keeping tabs on your starter. Make sure it’s active and bubbly for killer results!
Pay attention to quality checkpoints, like checking the dough line before the final rise. it should feel soft, tacky, but not sticky.
If it seems too wet, you've likely added too much water or not enough flour.
And let’s not forget about critical temperatures. the internal temp of your bread should be around 200° f to 210° f ( 93° c to 99° c) when it's perfect.
Visual cues for doneness? look for a deep, golden-brown crust that can put a smile on anyone’s face!
Success Strategies for Beginners
Baking sourdough can feel daunting, but you got this . keep a journal of what works for you and what doesn't.
This is key for beginners sourdough baking . try to mix and match recipes until something clicks. i also suggest making small substitutions, like using whole grain flour or adding seeds.
These variations can impact flavor and texture.
When you're getting started, patience truly is a virtue. allow enough fermentation time; that's where the nutritional benefits and flavor development come in.
And if you're tempted to rush it, just remember: good things come to those who wait!
As you embark on this delicious journey of how to bake sourdough, remember that you're creating something that's not just tasty, but also incredibly healthy—like a delicious nutritional sandwich bread .
Plus, with all that fermentation, sourdough is surprisingly good for your gut health.
Additional Information...
Baking sourdough bread at home is truly rewarding. once you've mastered the basics, the sourdough variations are endless! whether you want to try different flours or add herbs and seeds, the world of sourdough is yours to explore.
So roll up those sleeves and let’s get baking!
Pro Tips & Secrets for Baking Sourdough Bread
Alright, friends! when you're all set to bake sourdough bread - healthy & tasty , you want to make sure you have a few tricks up your sleeve.
I’ve learned some things over my baking adventures, and i’m excited to share them with you.
Chef's personal insights: start by keeping your sourdough starter fed and bubbly. you want it to be "alive" before using it.
That wild yeast is your best friend for that delicious fermentation process for bread! now, if your dough isn't rising as it should? give it more time.
Sourdough can be picky but oh-so-worth it.
Time-saving techniques: use easy sourdough techniques to get more done in less time. instead of kneading, try the stretch and fold method.
It’s much easier! plus, it builds up your gluten development in bread without all the fuss.
Flavor enhancement tips: want an extra boost? add a tablespoon of honey to your dough for a hint of sweetness.
Or mix in some herbs and spices. if you’re feeling adventurous, throw in some roasted garlic – trust me, your taste buds will do a happy dance.
Presentation advice: let’s make your bread look as good as it tastes! use a lame or sharp knife for scoring your sourdough.
It not only looks fancy but allows the bread to expand beautifully while it bakes. plus, consider brushing the top with a little olive oil before baking for a golden crust.
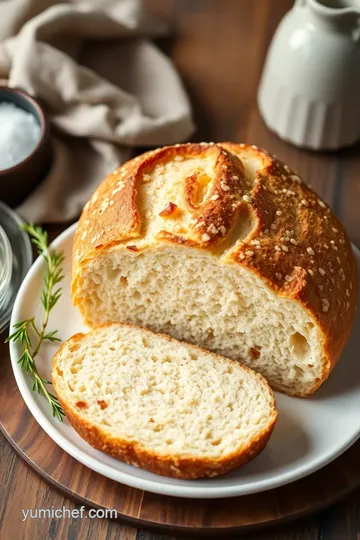
Perfect Presentation: Make Your Loaf Shine
Now, let’s talk plating techniques. When your beautiful loaf is out of the oven, it deserves a stage. Place it on a wooden board or in a cute basket.
Garnish ideas: fresh herbs or slices of seasonal fruits look stunning next to your bread. ever tried pairing it with bright cherry tomatoes or some zesty lemons? it not only enhances the flavor but makes the whole dish pop visually.
Color Combinations: Aim for contrasts. The crunchy, golden brown crust against a fresh green salad or a rich, dark soup creates visual appeal that catches the eye!
Storage & Make-Ahead: Keep It Fresh
Now, let’s not forget about keeping that delicious sourdough fresh!
Storage Guidelines: After your bread has cooled, wrap it in a breathable cloth. This trick will keep that perfect sourdough crust crispy without getting soggy.
Preservation Methods: If you want to keep it longer, it’s easy-peasy! Slice it and store it in the freezer. Just pop those slices in the toaster when you're ready to enjoy.
Reheating instructions: if you're reheating, don’t microwave! you’ll lose that crispy crust. instead, warm it in the oven for a few minutes at 350° f ( 175° c) for that freshly baked taste.
Freshness Duration: Ideally, this loaf is good for about 3-5 days at room temperature. But trust me, it won’t last long!
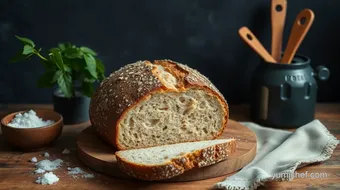
Creative Variations: Mix It Up
Let’s take this sourdough to the next level with some flavor adaptations! Switch it up by adding different flours. Using whole grain sourdough gives it a nutty flavor and boosts nutrition.
Dietary Modifications: If you’re looking for gluten-free options, try using a gluten-free flour blend. Just be aware that the texture will change a bit.
Seasonal Twists: Change things up with the seasons. In the fall, toss in some pumpkin puree for a lovely autumn loaf!
Regional Variations: Explore sourdough from different regions. Consider using herbs or spices local to your area, like rosemary or sage. This adds a personal touch to the traditional sourdough recipe.
Expert FAQ Solutions
Maybe you’ve got some questions as you dive into baking. Here are some common ones:
What if my bread is too dense? You might not have allowed enough time for gluten development, or maybe your starter wasn’t active enough. Don’t stress! Try again, learn from it!
How can I make crusty bread? Ensure you’re preheating your Dutch oven. That initial steam will help form that perfect sourdough crust .
Conclusion: Your Delicious Journey
So there you go, my fellow bakers! with these tips, you’re ready to dive into baking sourdough at home . remember, patience is key, and every loaf is a chance to learn.
Don't sweat the small stuff! keep trying, experiment, and soon you'll be a pro at creating artisanal bread that’s also super healthy .
Get out there and enjoy the process of baking. You’ve got this!
Happy baking!
Crusty Artisan Sourdough Bread: A Healthy & Delicious Delight Card
⚖️ Ingredients:
- 120g (1/2 cup) all-purpose flour
- 120g (1/2 cup) water (room temperature)
- 500g (4 cups) bread flour
- 375g (1 1/2 cups) water (room temperature)
- 150g (1/2 cup) active sourdough starter
- 10g (1 3/4 teaspoons) sea salt
🥄 Instructions:
- Step 1: In a mixing bowl, combine flour and water for the starter. Mix until there are no dry spots. Cover and let sit at room temperature for 8-12 hours.
- Step 2: In a large mixing bowl, mix together bread flour and water. Let it rest for 30 minutes (autolyse).
- Step 3: Add the active starter and salt to the dough. Mix until well incorporated.
- Step 4: Cover the bowl with a damp cloth and let it rise for 4-5 hours at room temperature. Every 30 minutes, perform a stretch and folds to build gluten.
- Step 5: Turn the dough out onto a floured surface and shape it into a round. Cover and let rest for 30 minutes.
- Step 6: Shape the dough into its final form and place it seam side up in a floured proofing basket. Cover and let rise for 1-2 hours.
- Step 7: About 30 minutes before baking, preheat your oven to 450°F (232°C) and place your Dutch oven inside.
- Step 8: Carefully remove the Dutch oven, and transfer the dough (seam side down). Score the top with a lame. Cover with the lid and bake for 30 minutes.
- Step 9: Remove the lid and bake for an additional 15-20 minutes until golden brown.
- Step 10: Allow the bread to cool on a wire rack for at least 1 hour before slicing.
Previous Recipe: How to Bake Chocolate Lava Cake | Gooey & Delicious: My Favorite Recipe
Next Recipe: How to Bake Chocolate Chip Cookies: Chewy & Delicious Family Treat