Crispy & Delicious Sourdough Bread Recipe
Curious about baking? Join me in making the perfect sourdough bread: crispy & delicious! Tips from my kitchen to yours, let's create together!

The Joy of Baking Sourdough Bread
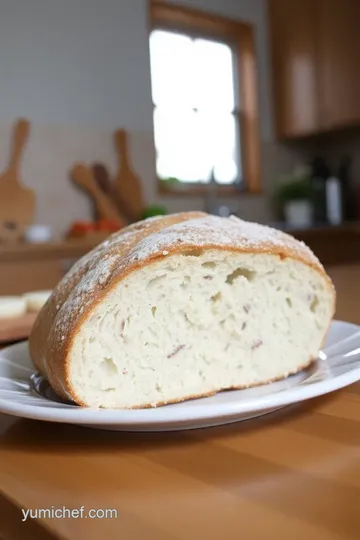
Oh my gosh, have you ever pulled a loaf of fresh bread out of the oven that just sings to you with that crunchy sourdough crust? i can still remember the first time i baked sourdough bread—it was like a rite of passage in my kitchen.
The smell filled the entire house, and the best part? i got to slice into that glorious loaf, revealing the airy, chewy texture inside.
Honestly, if you’ve been thinking about trying to bake sourdough bread: crispy & delicious , let me take you on this fun journey, and trust me, you won’t regret it!
The Magic of Sourdough: A Recipe Overview
Sourdough bread isn't just any old loaf. its roots trace back thousands of years—like, ancient times! it’s a bread born from natural fermentation, a process that makes it healthier and super tasty.
Nowadays, artisan sourdough has become a popular staple in bakery cases across the country, but making it at home is where the real charm lies.
It does take some time, anywhere from twelve hours to a full day, but the process is worth the effort.
Now, when it comes to the difficulty of baking sourdough, i'd put it at a solid medium . you’ll need some patience and get comfy with a few techniques, like the stretch and fold method, but don’t stress! once you get the hang of it, you’ll be mastering sourdough in no time.
Plus, the cost isn’t too crazy, especially since one batch can yield a large loaf that will keep the whole family happy.
A Slice of Health
Now, let’s chat about the key benefits of sourdough. first off, it’s loaded with nutritional benefits ! the natural fermentation helps break down gluten, making it easier on the tummy.
Did you know it can also help you feel fuller longer? it's true! sourdough gets a thumbs-up for being a great choice for sandwiches, toasts, or even as an impressive dinner side.
What’s exciting about sourdough is how versatile it can be! want to switch things up? you can toss in herbs or even make a rye sourdough variation.
You can also use whole wheat flour for a nuttier flavor. and don’t get me started on how delightful it is with a little homemade jam or some fancy cheese—you’ll have your friends begging for the recipe!
Keeping It Real in the Kitchen
Now, while you're gearing up for your sourdough adventure, it's a good idea to keep some bread baking tips in mind.
For one, use a digital scale for accuracy when measuring your ingredients—this isn’t the time to wing it. and remember to keep a close eye on your dough temperature; this can really make or break your fermentation process.
Don’t rush the cooling step either—if you slice that loaf too early, you’ll lose that perfect crumb texture!
If you think about it, sourdough baking is like a science experiment, but much tastier. with a bit of patience, you can avoid common sourdough baking mistakes that many beginners face.
And who knows? maybe your journey will lead to some creative kitchen masterpieces.
The Next Step: Ingredients Ahoy!
Ready to dive into the nitty-gritty? let’s gather the ingredients for your very own crispy and delicious sourdough bread. you’re going to need bread flour, water, an active sourdough starter, and of course, that all-important sea salt.
The right tools will set you up for success, too—think a dutch oven, mixing bowl, and a banneton. arm yourself with those, and you're one step closer to, dare i say it, perfecting the sourdough crust!
So grab your apron and let’s make that kitchen dance with the aroma of freshly baked bread!
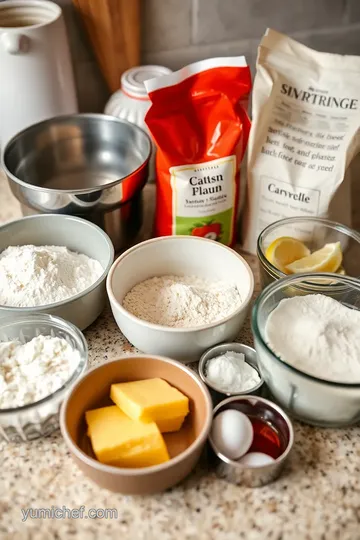
Essential Ingredients Guide
So, you're ready to bake sourdough bread: crispy & delicious ! first things first, let’s chat about the essential ingredients you’ll need.
Trust me, having just the right ones can make or break your experience—and in this case, we're aiming for total bread victory !
Premium Core Components
Every good sourdough bread recipe starts with quality ingredients, so let’s break it down:
-
Bread flour: you’ll want about 500g (that’s 4 cups for us american bakers) of high-gluten bread flour . it gives your loaf that awesome chewy texture and structure.
Take note, bread flour vs all-purpose flour can totally change your end product.
-
Water: use about 350ml (or 1⅓ cups); ideally, the water should be at room temperature. too hot? you’ll kill that precious sourdough starter .
Too cold? the fermentation might stall. aim for the goldilocks zone: just right!
-
Sourdough Starter: You need 100g (that’s ½ cup) of an active and bubbly sourdough starter . This is what gets the fermentation party started, giving your bread that signature tang.
-
Sea Salt: Just 10g (about 2 teaspoons). Salt helps with flavor and controls the fermentation process.
Quality Indicators and Freshness Tips
Now, how do you tell if these ingredients are good quality? bread flour should feel fine and slightly gritty, not dusty.
Your water should be clear—no funky smells or flavors. the sourdough starter ? look for bubbles and a pleasant, tangy aroma!
Storage? keep that flour in an airtight container in a cool, dark place. the salt can hang out in the pantry.
As for the sourdough starter, store it in the fridge, feeding it weekly if it’s your baby! trust me, this makes all the difference when mastering sourdough .
Signature Seasoning Blend
Ah, the secret to flavor! While the key ingredients shine, let's not forget some signature spice combinations :
-
Herbs: For those moments when you want to jazz things up, think rosemary or thyme. They're perfect for creating breads with herbs .
-
Aromatics: Ever tried adding garlic powder or seeds like sesame? They provide an unexpected crunch and flavor enhancement that’ll knock your socks off!
-
Regional Variations: Consider using different flours like whole wheat or rye for a rye sourdough variation . Each brings a unique flavor and texture. Go bold and experiment!
Smart Substitutions
What if you find yourself in a baking pickle without all your ingredients? No sweat! Here are some common alternatives:
-
If your bread flour is running low, substitute with all-purpose flour , but keep in mind the chewy texture bread may not be quite as stellar.
-
For those avoiding gluten, try using a gluten-free flour blend, though the results may vary.
-
Have a forgotten yeast packet? You can still drive that fermentation process home with your sourdough starter !
Kitchen Equipment Essentials
Let’s get your baking game solid with the right gear:
-
Mixing Bowl: You’ll need a good-sized bowl to mix your dough.
-
Dough Scraper: This makes handling your slippery dough a breeze.
-
Dutch Oven or Baking Stone: Ideal for achieving that crunchy sourdough crust . It traps steam, giving you an artisan-like loaf.
-
Banneton: To help with loaf proofing, it’ll give your bread that nice shape while allowing air circulation.
Alternative Tools and Storage Solutions
You don’t have to break the bank—things like a regular pot with a lid can work, just watch your baking time.
And for storing your bread? pop it in a bread box or paper bag to keep that crust crispy!
In this journey of baking with sourdough , remember that preparation is key. Measure your ingredients with a digital scale for accuracy; it’ll save you from those pesky sourdough baking mistakes to avoid !
From the art of fermentation to those intriguing scoring techniques, your adventure in the kitchen has just begun! we’re not just making homemade bread ; we’re creating an experience, something to bond over with family or friends.
So, roll up those sleeves, and let's get started. It’s time for the step-by-step instructions to make that crusty loaf that's sure to impress! Happy baking!
Mastering the Art of Professional Cooking: Bake Sourdough Bread, Crispy & Delicious
Cooking can feel like an olympic sport sometimes, right? with all the timing, techniques, and fancy terms thrown around, it can be overwhelming.
But here’s the good news—if you know the basic steps and the right preparation, you can totally crush it! today, let’s dive into how to bake sourdough bread: crispy & delicious and not just that, we’ll tackle the professional cooking methods that can apply to any dish.
Essential Preparation Steps
Let’s start with the all-important mise en place . this is a fancy term for getting everything in place before you even think about cooking.
It’s not just for chefs in top kitchens. i’m talking about laying out your ingredients, tools, and having a clear game plan.
Gather your 500g of bread flour , 350ml of water , and your active sourdough starter . trust me, it makes life so much easier!
Now, let’s talk about time management . i mean, isn’t that why we love our smartphones? set timers for each phase! the dough should rest and ferment for about 12- 24 hours .
Yep, it needs time to work its magic! and remember, as the dough ferments, you should have a good chunk of that time dedicated to safety considerations —handle that hot dutch oven with care.
Step-by-Step Process
-
Mix the Dough : Combine that bread flour with water and let it rest for 30 minutes . Autolyse, baby! This step really develops gluten.
-
Add Starter & Salt : Mix in your sourdough starter and sea salt . Love how it all comes together!
-
Bulk fermentation : let that dough rise for 4- 6 hours . you’ll do some stretch and folds every 30 minutes for the first two hours.
It’s a little workout for your dough!
-
Shape the Dough : Flip it out onto a floured surface and shape away! Look for a nice, smooth round loaf.
-
Proof : This is where patience comes in again. Proof it seam-side up for 2- 4 hours , or in the fridge overnight for those big flavor points.
-
Preheat Oven : Get that oven cranking to 450° F ( 232° C) with the Dutch oven inside. You’re creating an oven within an oven—super crisp, here we come!
-
Score & bake : time to score your dough with a razor blade. this allows it to expand during baking, creating that perfect crunchy crust .
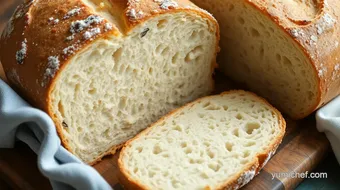
Bake covered for about 30 minutes and then an additional 15- 20 minutes uncovered until golden brown.
Oh man, your kitchen is about to smell heavenly.
-
Cool Down : Let it cool for 30 minutes on a wire rack. If you slice too soon, you’ll lose that awesome chewy texture!
Expert Techniques
Want to level up? here are some professional methods . first, roasted bread flour gives excellent structure— switch from all-purpose to really make that loaf sing! also, get familiar with the scoring bread technique .
A good score isn’t just for aesthetics; it affects how your bread rises.
When things go wrong, and they sometimes will, it’s okay! if your loaf didn’t rise as expected, check your sourdough starter .
Has it been fed recently? the fermentation process is key. and if the crust didn’t turn out like you imagined? keep an eye on your oven temperature — ozone circumstances can ruin that sourdough flavor enhancement .
Success Strategies
Now, don’t freak out. There are common sourdough baking mistakes to avoid . For instance, using too much water can lead to sticky disasters. Trust me on this!
Use a digital scale for measurements to ensure your bread dough hydration is just right. and remember, good things come to those who wait.
So allow enough time for bulk fermentation. it really does make a difference, not just in taste but in the structure of your chewy texture bread .
Also, consider make-ahead options . The dough can rest in the fridge up to 24 hours , so you can fit it into your busy schedule.
Now that you’re armed with these pro tips and techniques, let’s get our hands doughy! remember, it’s about enjoying the process as much as the perfect loaf.
There’s something truly rewarding about creating homemade bread that embodies the traditions of artisanal sourdough .
Additional Information
If you’re eager to learn more about the art of making sourdough bread , dive deeper into different variations, like trying a rye sourdough variation or even whole wheat for a heartier loaf.
Each has its charm and flavor. happy baking, and may your kitchen always smell like freshly baked bread!
Pro Tips & Secrets
Alright, folks! let’s dive into the magic of sourdough bread. it’s not just about having a sourdough starter sitting in your fridge.
It’s about mastering sourdough with some nifty tricks. here are my pro tips to help you bake the perfect loaf.
First things first: patience is key . a lot of people expect instant results, but sourdough is all about that natural fermentation .
So, don’t rush the fermentation process. plan your baking around your schedule, allowing 12- 24 hours for that dough to rise beautifully.
You’ll notice a serious flavor boost if you wait a bit longer.
Next, let’s talk about that crunchy sourdough crust . for a killer crust, you can try using a dutch oven . preheat it for about 30 minutes before tossing in your loaf.
This step traps steam, creating that perfect golden crust we all drool over. and when you’re ready to score your dough, use a sharp blade or a bread lame .
It sounds fancy, but it’ll give you those clean cuts that make your bread look like it came from a bakery!
Perfect Presentation
Okay, now that's your loaf is baked to perfection, let’s focus on the fun part— presentation ! After all, we eat with our eyes first, right?
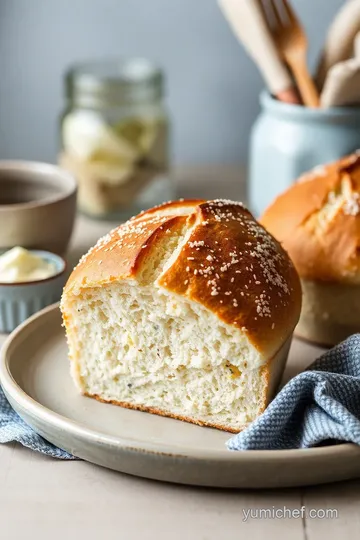
When it comes to plating , i often think about colors. pair that beautiful golden-brown bread with some bright green herbs or a rich, red tomato jam.
Maybe sprinkle some fresh rosemary or thyme on top for an aromatic kick. you can get creative with your garnish ideas —think edible flowers or colorful microgreens.
Who wouldn’t want their bread to look like art?
And let's not forget about the visual appeal of serving. consider slicing the bread right before serving or offering a whole loaf with a knife for a rustic feel.
It's like inviting everyone to the table for a warm slice of comfort.
Storage & Make-Ahead
Now, let’s chat about how to store that glorious loaf. first off, if you’ve got leftovers (which doesn’t always happen in my house), wrap it in a clean kitchen towel .
This keeps the crust nice and crunchy. or, if you want to keep it for longer, you can freeze it.
Just make sure to slice it first—trust me, it's a game changer for quick toast later on.
To reheat, pop those slices in the oven for a few minutes at 350° f ( 175° c) . this revives that delicious chewy texture and makes the crust crispy again.
As for freshness, i’d say your homemade sourdough will last about 3-5 days at room temperature , and a little longer in the freezer.
Creative Variations
Feeling adventurous? bake sourdough bread: crispy & delicious with a twist! there are endless options here. want a kick? add some spices like red pepper flakes or garlic powder right into your dough for that zesty flavor.
And if you’re looking for something seasonal, try adding pumpkin puree in the fall or some chopped nuts and dried fruits for a festive loaf during the holidays.
Oh! and don't overlook regional variations ! think about swapping out some of your bread flour for whole wheat flour or even a touch of rye for richness.
Complete Nutrition Guide
Alright, it’s time to get serious about what you’re munching on. sourdough isn’t just delicious; it’s loaded with nutrients thanks to the fermentation process .
This process breaks down some of the gluten, making it easier on your belly. plus, those probiotics? they do wonders for your gut health.
Rough estimate? a slice of sourdough bread is about 120 calories , but don’t let that scare you. it’s all about balance.
If you’re counting macros or just being mindful, a slice of artisanal sourdough packs in around 3g of protein too!
Expert FAQ Solutions
You’ve got questions, and i’ve got answers! a common question i hear is, “why didn’t my sourdough rise?” well, it might be your sourdough starter .
Make sure it’s bubbly and active before using it! that’s where the magic begins.
Another question? “is my dough too wet?” if it’s sticking to your fingers like glue, you can add a bit more flour during your stretch and fold method .
Remember, adjusting hydration based on the flour type is vital.
In the world of baking, mastering sourdough can seem daunting, but i promise you, the rewards are huge! from that crunchy crust to a chewy texture , the effort is worth it.
Don’t get discouraged by mistakes—everyone makes them, even the pros. if you keep experimenting with flavors and techniques, you’ll be a sourdough superstar in no time!
So, grab your sourdough starter , roll up your sleeves, and start that baking adventure! Happy baking!
Crispy & Delicious Sourdough Bread Recipe Card
⚖️ Ingredients:
- 500g (4 cups) bread flour, plus extra for dusting
- 350ml (1⅓ cups) water, at room temperature
- 100g (½ cup) active sourdough starter
- 10g (2 tsp) sea salt
🥄 Instructions:
- Step 1: In a mixing bowl, combine the bread flour and water until no dry flour remains; cover and let rest (autolyse) for 30 minutes.
- Step 2: Incorporate the active sourdough starter and sea salt into the dough; mix thoroughly.
- Step 3: Allow the dough to rise at room temperature for 4-6 hours, performing stretch and folds every 30 minutes for the first 2 hours.
- Step 4: Gently turn the dough onto a floured surface; shape it into a round loaf.
- Step 5: Place the dough seam-side up in a floured banneton; cover and let it proof for 2-4 hours at room temperature or overnight in the fridge.
- Step 6: Preheat your oven to 450°F (232°C) with a Dutch oven inside for 30 minutes.
- Step 7: Carefully transfer the dough onto parchment paper; score the top with a razor blade. Transfer to the Dutch oven and cover.
- Step 8: Bake for 30 minutes covered, then remove the lid and bake for another 15-20 minutes until golden brown.
- Step 9: Remove from the oven; let it cool on a wire rack for at least 30 minutes before slicing.
Previous Recipe: How to Make Sautéed Vegetable Soup: Wholesome Comfort in 30 Minutes!
Next Recipe: How to Make Quick Tomato Soup - Delicious & Easy Comfort in 30 Minutes